
Proper ventilation is the key to growing indoor gardens. Without fresh air and controlled humidity, your plants can suffer from heat stress, low CO₂ levels, and mold. That’s where an inline duct fan comes in. Whether you’re using a 4-inch fan for a small tent or a 6-inch fan for a larger setup, these fans help circulate air, maintain ideal temperatures (72–85°F), and keep humidity between 40–60%. Pairing them with carbon filters to eliminate odors and create a clean, healthy grow environment. This article explores how to install an inline duct fan in a grow tent the right way to prevent mold, remove odors, and optimize your indoor garden.
Why Ventilation Matters in Grow Tents
Ventilation is the foundation of a successful indoor garden. Without enough airflow, even the most well taken care of plants will struggle to thrive. Let’s discuss why ventilation is so important in growing tent environments.
1) Airflow and CO2 supply
Plants need a constant supply of carbon dioxide to photosynthesize. CO2 levels can deplete quickly in a closed grow tent without proper air circulation. Regular air exchange replenishes those vital CO2 levels so plants can produce the energy for growth.
An inline duct fan pulls out stale air and draws in fresh CO2 rich air, creating the perfect environment for photosynthesis. This air renewal mimics outdoor conditions and allows plants to reach their full potential.
2) Humidity and temperature control
Temperature and humidity levels affect plant health and development. The ideal temperature range for most plants is 70-85°F (21 and 29°C) and 40-60% humidity during veg and 40-50% during flower. Without proper ventilation, temperatures can get way too high due to heat from grow lights. Also, plants release moisture through transpiration which can increase humidity in an enclosed space.
Excessive humidity prevents plants from transpiring properly and they will retain the water they absorbed. This retention can cause nutrient deficiencies as plants can’t uptake water and nutrients through their roots. An inline duct fan helps regulate both temperature and humidity by pulling out hot, humid air.
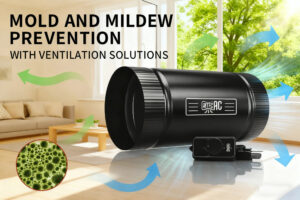
3) Odor and mold prevention
The most serious consequence of bad ventilation is mold and mildew. Stagnant air, particularly in high humidity, creates an ideal environment for pathogens to thrive. Proper airflow makes it much harder for mold spores to settle on plant surfaces.
Also, good ventilation helps control odors that might come out of your grow tent. When paired with a carbon filter, an inline duct fan “scrubs” the air and neutralizes smells before they escape into surrounding areas. This odor management is especially important for growers who want to be discreet.
Choose the Right Inline Fan for Your Tent
Choosing the right inline duct fan is a critical decision for any grow tent setup. The right fan will give you optimal conditions and the wrong one will compromise your whole growing environment.
Inline fan 4 inch vs. 6 inch
Size matters when choosing between 4-inch and 6-inch inline fans. A 4-inch inline fan usually delivers 100-205 CFM (cubic feet per minute) and is suitable for smaller grow spaces like 2×2 or 3×3 tents. A 6-inch model has much higher airflow, 250-405 CFM. Beyond raw power, these fans differ in practical application.
For a standard 4×4 grow tent, a 6-inch inline fan provides enough airflow even with filters and moderate ducting. This allows the fan to run at lower speeds and therefore reduce noise and extend equipment life. A 4-inch fan has to run at max capacity to get enough ventilation in mid-sized tents.
Match the fan CFM to the tent size
Finding the right CFM is easy. First, multiply your tent’s length, width and height (in feet) to find the volume. For instance, a grow tent measuring 4’x3’x6’ has 72 cubic feet, serving as your baseline CFM.
But that number must be adjusted based on what’s inside the tent. Using a carbon filter? Just multiply your baseline CFM by 1.6. If you have ducting, multiply by 1.2. If you have a silencer, add another 1.2. And if you have LED grow lights, multiply by 1.5.
Applying all those adjustments to the 72 cubic feet example gives you: 72 x 1.6 x 1.2 x 1.5 = 207 CFM. Once you have that number, choose a fan that’s at least 25% more powerful and you’ll be good to go. So in this case, a fan rated at around 260 CFM or higher would be perfect.
Consider noise level and energy use
Energy efficiency is becoming more important in fan selection. Look for EC (electronically commutated) motors, they offer more efficiency, less noise and precise speed control. The minimum efficiency level for a good inline fan should be 3.8 CFM/W.
Noise levels vary between models and operating speeds. Many manufacturers now include soundproofing materials and improved blade designs to reduce operational noise. For installations near living spaces, consider adding a fan silencer, but be aware that it will reduce airflow by about 20%.
Need better air quality? Consider an inline filter box along with your fan to trap dust and contaminants before they reach your plants. Quality filter boxes ensure cleaner air while maintaining proper airflow. Check out specialized inline filter box options at Inline Filter Box for solutions that match your ventilation system.
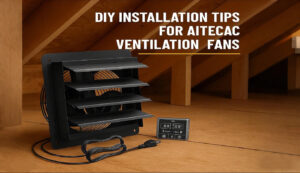
Install the Inline Duct Fan Safely and Effectively
Installing an inline duct fan correctly requires strategic placement and secure mounting for the best performance. Once you’ve chosen the right fan for your grow tent, proper installation is the next step.
1) Hang the fan and carbon filter
Hang both your fan and carbon filter at the top of the grow tent where the warm air rises. This is where you get the most efficiency for removing hot, humid air. Each pair of heavy-duty rope hangers supports up to 150 lbs of equipment. Hang your carbon filter first then your inline fan, whether it’s a 4” or 6” model.
When mounting inside the tent make sure there’s enough clearance between the equipment and your grow lights or plants. Or you can mount the fan outside the tent to save internal space but increase noise in your growing area.
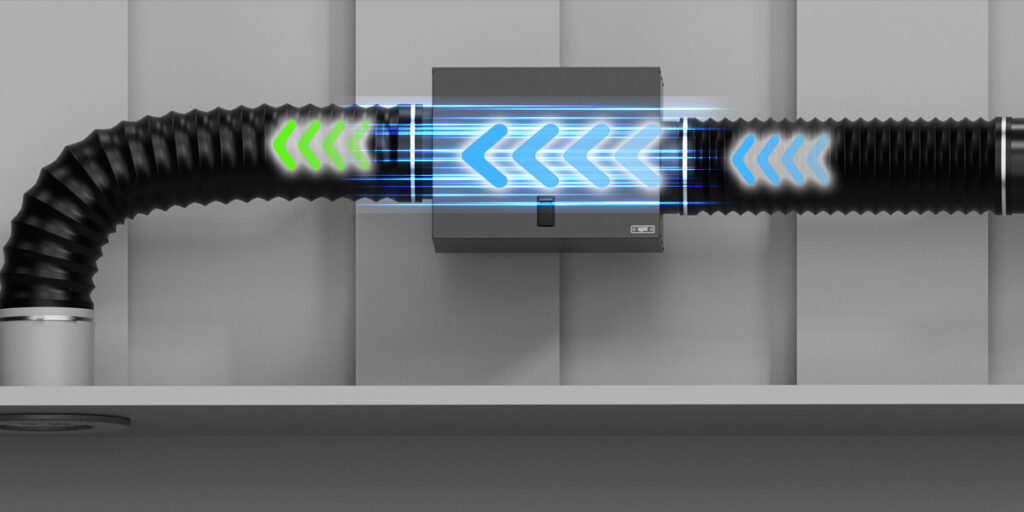
2) Connect ducting and secure with clamps
Once your equipment is hung, measure and cut the ducting to the proper length, allowing some slack to avoid kinks. Then connect one end to the carbon filter and the other to the inline fan’s intake port. Then run ducting from the fan’s exhaust port to the tent’s exhaust opening.
Duct clamps are crucial in creating secure connections. They provide a strong grip to prevent air leaks which would reduce system efficiency and increase energy consumption. Apply clamps at every connection point and tighten them firmly but not too tightly to deform the ducting.
3) Use rope hangers or mounting brackets
Adjustable rope hangers have stainless steel locking ratchets that allow for height adjustments. To use them, simply hook the carabiner around your equipment, pull the rope to adjust height and let the ratchet mechanism lock automatically.
For heavier setups use mounting brackets attached to the tent’s frame. Avoid using temporary solutions like tape or loose zip ties that will fail over time.
4) Airtight seals and proper alignment
Properly sealed connections will enhance system performance and minimize energy waste. Inspect all connection points for gaps or leaks. Throughout the system minimize bends in ducting as each 90° bend reduces efficiency by about 20%.
Keep ducting runs as short and straight as possible for maximum airflow efficiency. After installation, turn on the fan and check for negative pressure – the tent walls should curve in when sealed properly. For better air quality in your grow tent, consider adding an inline filter box to your setup, available at Inline Filter Box.
Manage Your Ventilation System
Once your inline duct fan is in place, effective management ensures it runs at peak efficiency. A well controlled and maintained ventilation system ensures your grow tent remains perfect for plant growth throughout their life cycle.
1) Thermostat or Bluetooth controller
Modern inline fan controllers offer more than just on/off functionality. Thermostat fan-speed controllers adjust fan speed based on temperature and humidity inside the grow tent. These smart devices eliminate guesswork in maintaining ideal growing conditions and may reduce energy costs.
For tech-savvy growers, Bluetooth controllers allow remote monitoring and adjustment through smartphone apps. These advanced controllers let you create custom schedules, set alarms for environmental changes and view historical climate data as graphs. Some models even have programmable functions like automated triggers, timers, cycling and custom transitions between settings.
2) Clean fan blades and filters regularly
Carbon and resin build up inside fan components over time, reducing efficiency and creating fire hazards. So, schedule a monthly cleaning for your inline duct fan which takes only 15-20 minutes.
The cleaning process involves disconnecting power and detaching hoses, removing the fan face to access internal components, using a hand broom to sweep away particulates and reassembling and testing the system. Carbon filters need to be inspected every three months. A clogged filter cannot remove odors and may reduce airflow through your system significantly.
3) Check for airflow blockages
Check ducting for leaks, cracks or blockages that may obstruct airflow. Inspect all connections to ensure they are sealed with duct clamps or foil tape. Remember, long or convoluted duct runs with sharp bends can reduce airflow efficiency drastically.
Negative pressure, where the tent walls curve inwards, indicates proper airflow without leaks. If you notice positive pressure or odors escaping, check your setup.
4) Adjust settings based on plant growth stage
Different growth stages require different ventilation settings. Seedlings thrive with gentle airflow, while mature plants need stronger ventilation to avoid heat stress. With variable speed fans, you can adjust throughout the growing cycle.
Monitor humidity and temperature with a reliable digital thermometer and hygrometer. These readings will help you determine the right fan speed for each growth stage, so your plants get optimal conditions from seedling to harvest.
Why Choose Aitecac Inline Duct Fans
Looking for quality and performance? Aitecac has a range of powerful and efficient inline fans for all types of grow setups.
Inline Fan 6 Inch
Perfect for mid- to large-sized tents, this fan provides robust airflow, built-in filtration, and a low-noise profile. Ideal for serious growers who want maximum control over climate and odor.
Inline Fan 4 Inch
A compact and efficient option for beginners or small grow tents. Despite its smaller size, it delivers consistent airflow and integrates seamlessly with most carbon filters.
Inline Duct Fan Collection
Explore Aitecac’s full range of inline duct fans that feature advanced filtration, quiet operation, and easy installation. Whether you’re growing herbs, vegetables, or flowers, there’s a fan for every grow tent size.
Conclusion: Set Up for Success
Installing an inline duct fan in your grow tent is more than just a technical step—it’s essential for creating the ideal growing environment. With the right fan size, smart airflow planning, and proper installation, you’ll ensure your plants receive fresh air, balanced humidity, and protection from mold or odors.
Whether you need a compact 4-inch fan, a high-powered 6-inch model, or a complete inline duct fan setup, Aitecac offers reliable solutions. Take control of your grow tent’s climate, boost your yields, and let your indoor garden thrive like never before.